Builder Code Projects are most powerful when you connect an existing repository. Builder's AI intelligently looks through your technology stack, existing components, code styles, and design system to generate code that works with your tools and your style.
To create a net-new application from an existing repository:
- Go to the Projects page in the Builder app.
- Click the Connect Repo button, or click the down arrow to choose your version control platform.
- Choose an application from your linked repositories.
- Select Setup Visual Editing.
- Typically, you should select Start Auto Setup. If your application lacks configuration files or has a particularly complicated setup process, select Use Manual Setup.
- Builder's AI searches for configuration files and sets up your Project for you. In the meantime, add environment variables to the form on the right, if applicable.
- Click the Finish Setup button. This brings you to Builder's Visual Editor where you can prompt the AI for changes to your Project.

Connecting a repository to Builder requires some technical knowledge, and may require some debugging. For a more technical explanation of setting up a repository, visit the Projects setup overview.
Auto Setup searches for configuration files within your codebase. At any point during the setup process, chat with the AI to correct any incorrect assumptions or point it towards configuration files it did not find.
Refrain from suggesting code changes to the AI as part of this process. Code changes can be made before or after setup, but not during it.
Auto Setup does not consume user credits.
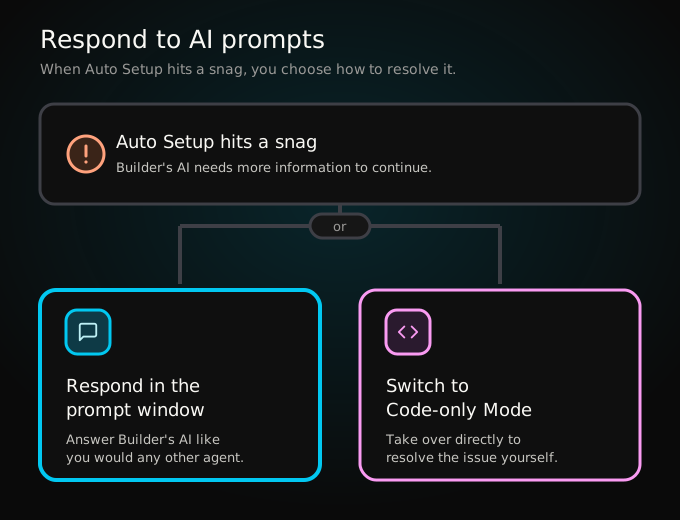
During Auto Setup, Builder's AI may ask you to provide additional information if it's unable to determine what to do next.
Respond to Builder's request as you would any other agent. You may be asked to provide values, or transition to Code-only Mode to solve issues.
To refine your application:
- Go to the prompt field embedded on the left, within the Chat tab.
- Write a new prompt specifying what you'd like changed.
- Click Enter.
Builder immediately begins to apply the changes.
For example, the following prompt would lead to Builder adding a reminder banner to the top of the page with some specific details.
Include a small banner to the top of the page, reminding
users when they need to RSVP by.
Without much guidance, Builder does its best to fulfill your request. For more fine-grained control, switch to Design mode or Import from Figma.
For the absolute best results, follow Prompt essentials such as including a screenshot or supporting material.
When making a prompt, you can adjust code output in the following ways:
- Attach files such as PDFs or images, Figma designs, or layouts copied from the Builder Chrome plugin.
- Connect Integrations, which can provide you with access to other services such as Linear, Netlify, or Zapier.
- Choose which AI model you wish to use, which affects code output and can decrease or increase the amount of Agent credits used.
To create a pull request after making changes to your Project, click the Send PR button. After clicking, Builder Code generates the pull request and then opens a new tab, directing you to your pull request.
Share your pull request with your team to get feedback and potentially merge your changes into your live application.
For more details, visit Create a pull request.